How To Create A Facebook Ad Account By Using Business Manager In 10 Minutes
Guide
You'll have an ad & Business Manager account ready to manage all your Facebook Assets and securely share them with employees or partner(s) by completing this guide.

SOP Overview
Execution Time: 10-15 mins
Goal: To create a Business Manager account and Facebook Ad Account for your business.
Prerequisites or requirements: You will need a personal Facebook account.
Why this is important: Facebook’s Business Manager allows you to easily manage multiple pages and ad accounts, while also being able to assign roles to your employees or contractors safely. Your Facebook Ad account will allow you to set up your first campaigns promoting yourself to the 2.85 billion active Facebook users worldwide in 2021.
Where this is done: In Facebook’s Business Manager.
When this is done: The first time you are creating a Business Manager account.
Who does this: The business owner or the person responsible for paid social advertising within the business.
P.S. This guide was pulled directly from our library of digital marketing SOPs (standard operating proceedures).
If you appreciate the level of detail and clarity in this information, check out our
project management suite.

Former infantryman turned real estate investor & digital marketer. I enjoy discussing growth strategies and the technical sides of growing a business.
Create a Business Manager Account
1. Go to https://business.facebook.com in your browser.
2. Click on “Create Account” on your right.
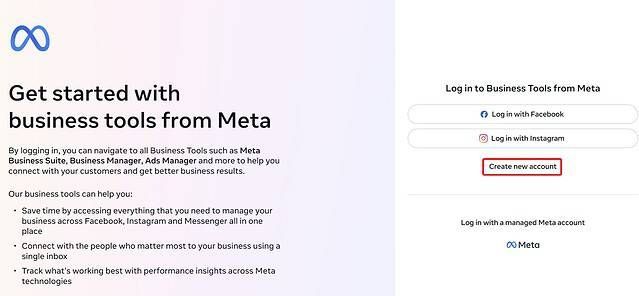
3. If you are not logged in to your personal Facebook account, you’ll be asked to log in:
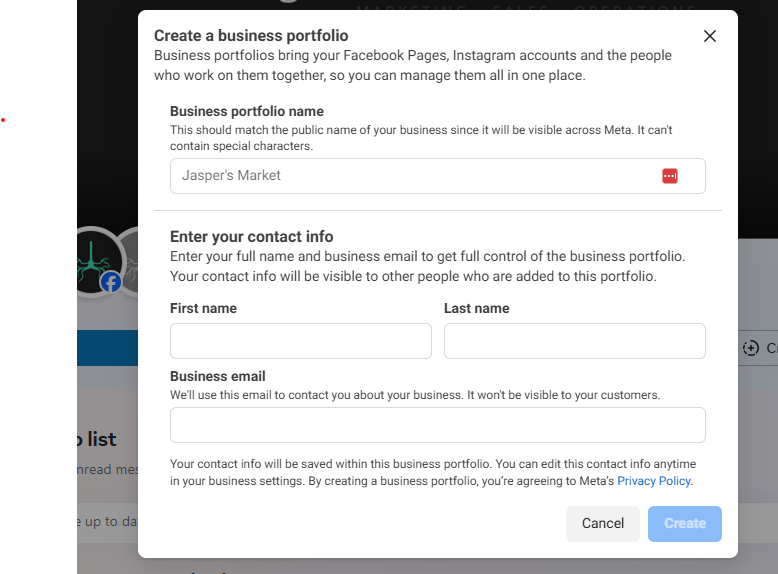
4. You are now creating your Business Manager Account:
a) Enter your contact and business information.
Note: Your business name is the name that will be visible to your employees or other people that you allow to manage your assets.
c)
Your Meta Business Suite is now created!
After confirmation, you will be taken to your Meta Business Suite account. That's it!
Create an Ad Account Through Business Manager
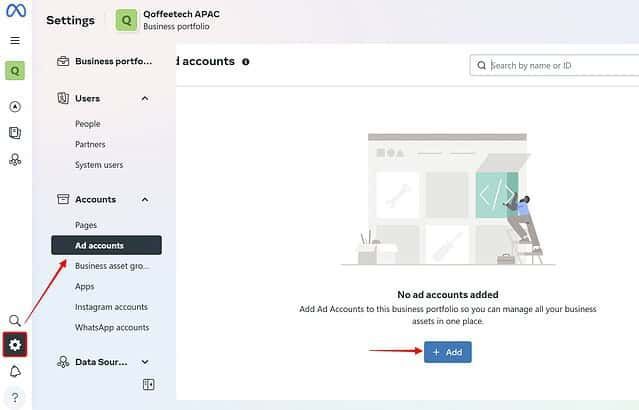
1. When in your Meta Business Suite homepage, click on “Settings” or the gear icon > “Ad accounts” > "+Add".
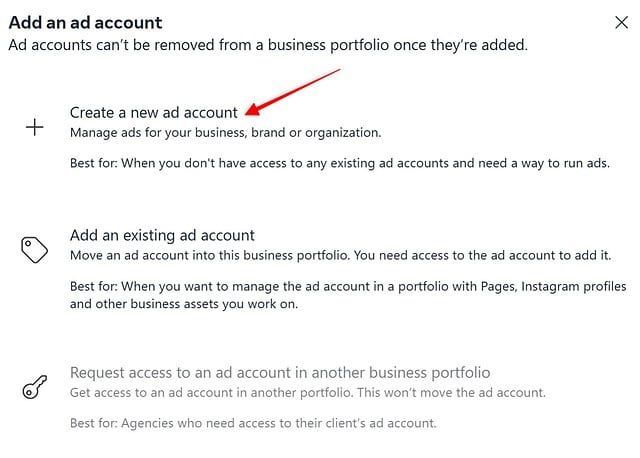
2. Click “Create a New Ad Account”
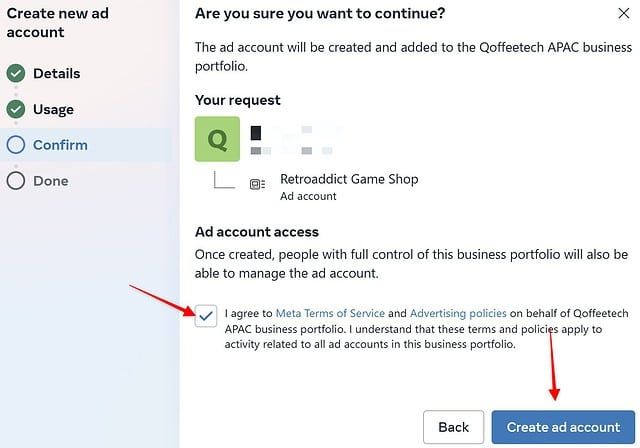
b) Review your settings and click "create" to confirm your account.
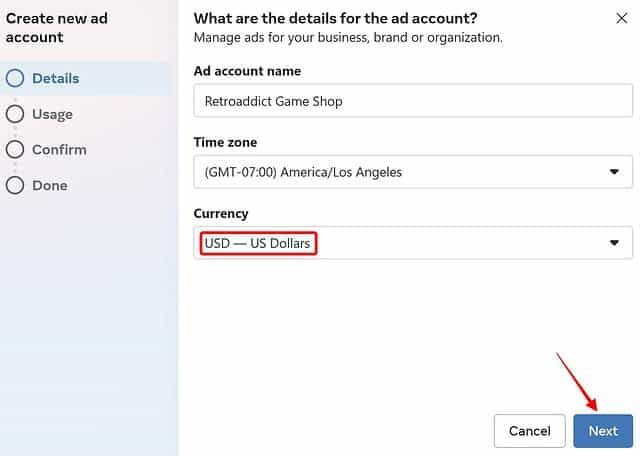
Note: Pay attention to the currency you want to be used for your account as you cannot edit this in the future. You can always create a new Ad Account If you want to do so.

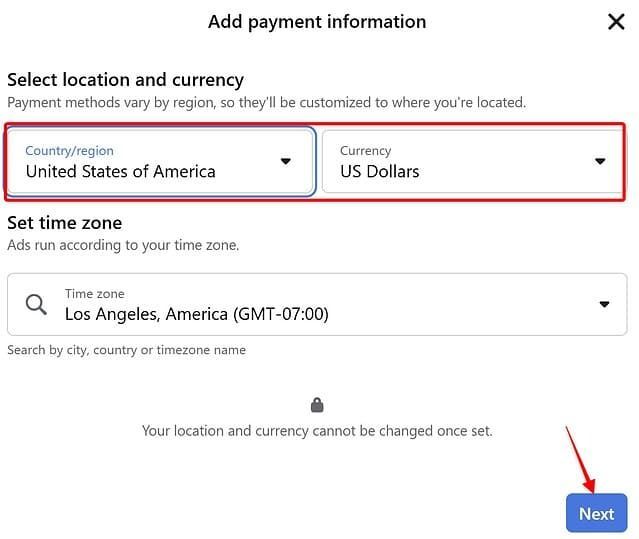
7. Make sure your "Location and Currency" is correct. Select your preferred time zone, then click on "Next".
3. Insert the details for your new ad account and click "Next".
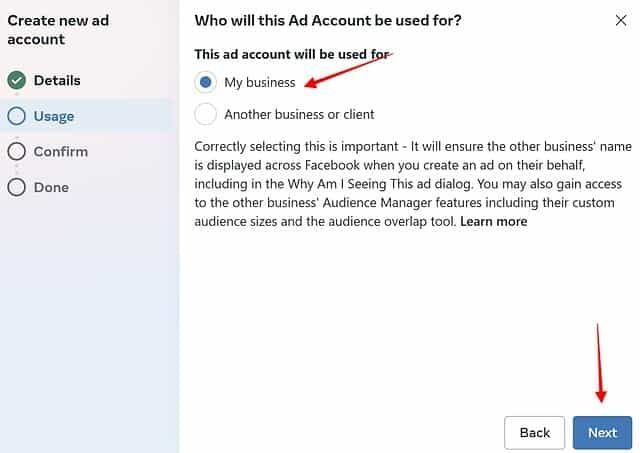
4. Select whether you are creating this ad account for your business or to advertise on behalf of another business and click "Next".
5. Next, tick on the box below to agree to Meta's terms of service and advertising policies. Click "Create ad account".
a) In the future, you might want to add employees or contractors to that Ad account as well. Those who have full access to this business portfolio will also be able to manage the ad account.
6. Your ad account has been created! If you don’t have a Payment Method set up, you will want to do it now. Click on ‘Add Payment Info’:
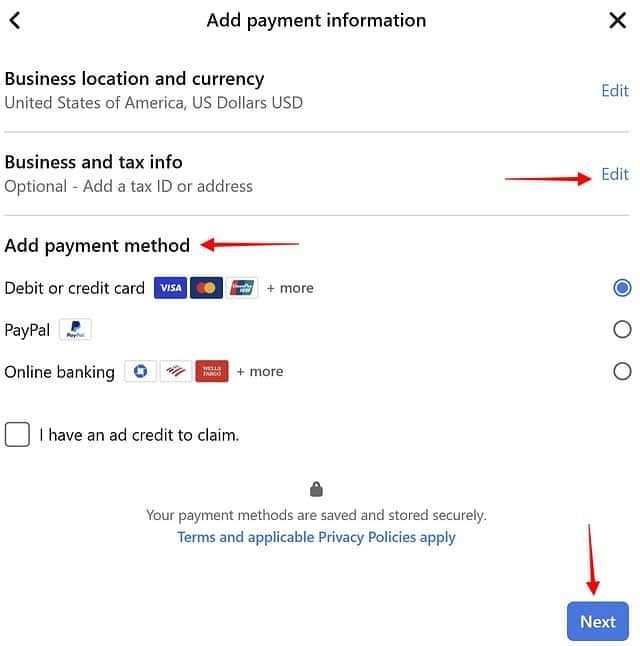
8. You can choose to fill up your tax details (optional). Select your preferred payment method, and then click on "Next."
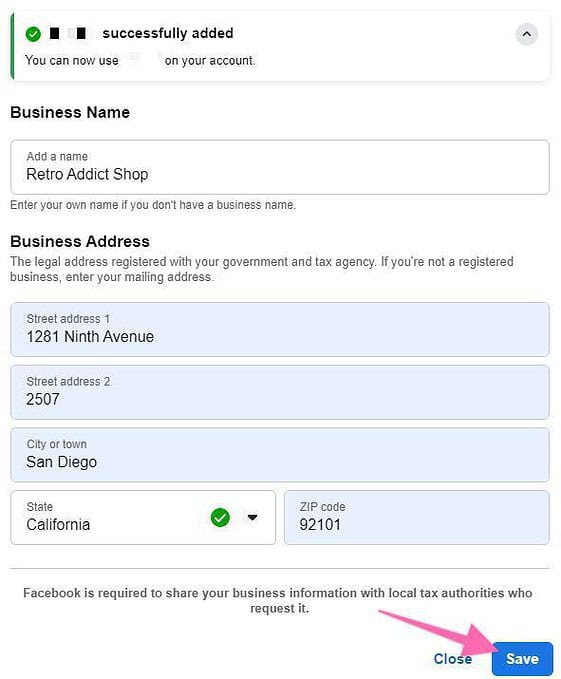
9. After successfully adding your payment details, you can now input your business address details. Click "Save".
Checking Your Facebook Payment Settings
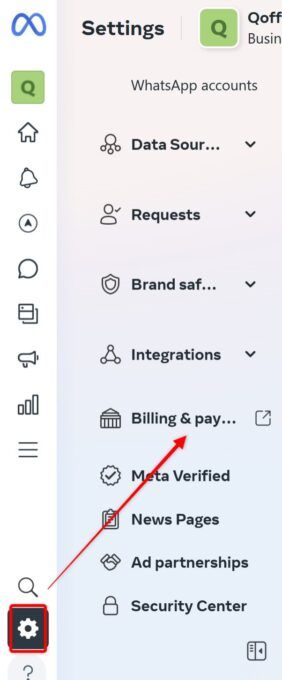
1. Go to your Meta ad account settings and click on "Settings” > "Billing & payment". This will lead you to a new tab on your browser.
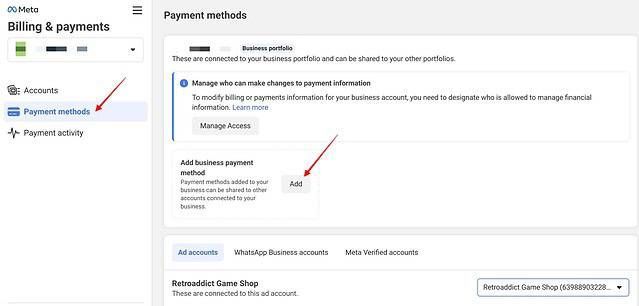
2. Next, click on “Payment methods”. Check if the payment method is showing the correct details. If it is blank, you may have to add it again by clicking on the “Add" button.
3. That's it! If you now go to your Meta Business Suite homepage, you should now be able to see your new Meta ad account.
Related Resources
Want Access To More Digital Marketing SOPs Like This?
If you'd like to get more digital marketing task done in-house (or DIY) check out our project management suite.